


Ghost Crafts for Kids
Ghost crafts for kids can be sweet, not spooky. This friendly session for ages 3-4 makes three simple ghosts — a cotton ball ghost, a handprint ghost, and a tissue ghost — then strings them into a garland to hang together.
The easiest ghost crafts for kids ages 3-4 are a cotton ball ghost glued on black paper, a white handprint ghost with a friendly paper face, and a tissue ghost draped over a crumpled tissue ball. Make all three at one table, then string them into a garland.

The short version
- Three friendly ghosts in one session — cotton ball, handprint, tissue — then string them into a garland.
- An adult draws the glue outline, cuts face pieces, ties string, and hangs.
- Stretch cotton thin and press with a whole palm onto thick glue.
- Paint the palm and press fingers-down; the fingers become the ghost's wavy bottom.
- Only non-toxic, washable supplies; small pieces are choking hazards — count them in and out.
- Keep faces smiling; unsure ghosts become cloud friends.
- Age
- Ages 3–4
- Prep
- 10 min
- Mess
- Some
- Difficulty
- Easy
- Where
- Indoor
Why kids love this
Ghost crafts for kids work beautifully at this age because every ghost here is soft, round, and silly — nothing jumps, glows, or growls. Your child gets stretching cotton balls, the tickle of a painted hand, and a floaty tissue ghost that bobs when blown on. Each ghost finishes fast, and all three end up in one proud garland.
What you'll need
- A craft tray or large baking tray
- Black craft paper — three sheets, plus scraps
- White paper — one or two sheets
- A bag of cotton balls
- A glue stick
- Non-toxic, washable white craft paint, wide brush
- Facial tissues — a small stack
- String or yarn, pre-cut by an adult
- Small black paper circles and ovals, pre-cut
- Small clips or clothespins
- An apron or old shirt
- A damp cloth, soap, towel
Before you start
1. Set the tray mid-table with everything in use order: paper, glue, cotton, faces, paint, tissues, string, clips. 2. Pre-cut faces: two black circles per ghost (eyes), one black oval per ghost (mouth). Keep the pile with you. 3. Pre-cut the string to fit your doorway or window, plus extra. 4. Apron on, sleeves up, damp cloth and soap ready before paint comes out. 5. Choose together where the garland will hang.
How to do it
-
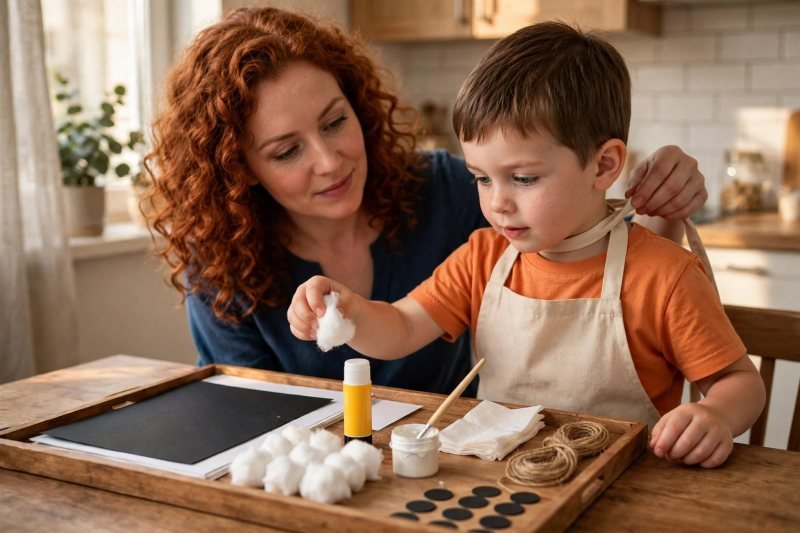
Set up the ghost craft tray. Lay everything out in rows on the tray — black paper; white paper; cotton balls; the glue stick; the paint and brush; the tissues; the string; and the black circles and ovals. Help your child into the apron and say: "Today we make three friendly ghosts: a fluffy one, a handprint one, and a floaty one — then we hang them all up together." Let your child squeeze a cotton ball and wave a tissue first. Agree the rule — all our ghosts smile — then reach for the black paper: ghost one starts with glue.
-
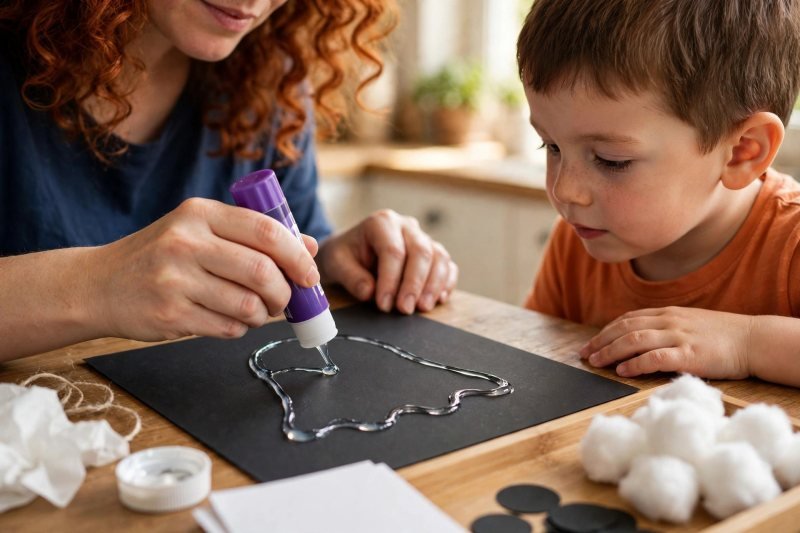
Spread the glue ghost. Lay black paper flat, hold the glue stick and draw a big, wobbly ghost outline — rounded top, wavy sides, wiggly bottom — pressing firmly so a thick ribbon of glue shows. Say: "Watch me draw our ghost with glue — round head, wavy tummy, wiggly tail." No letters; blobby is exactly right. Halfway around, let your child take over the pressing while your hand steadies theirs. Keep the glue line thick — it has a cloud of cotton to hold — and once the outline closes, the ghost needs filling.
-
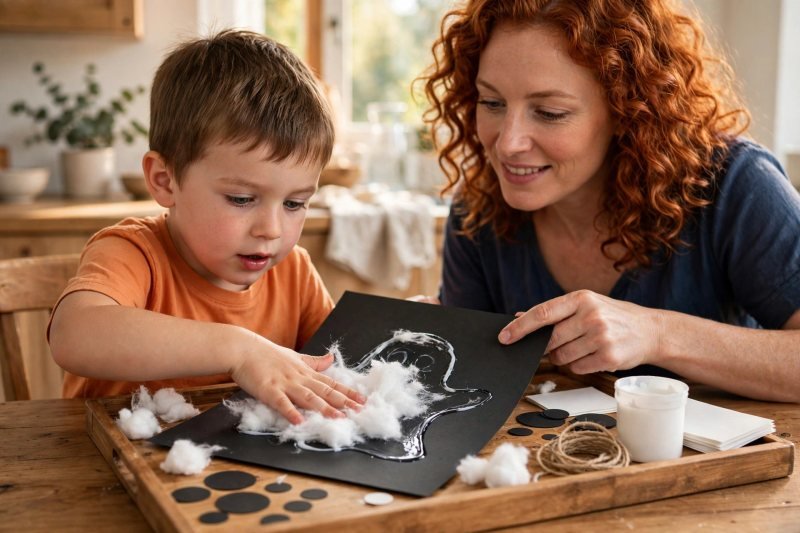
Fill it with cotton balls. Tip cotton balls onto the tray and show your child how to pull one apart, stretching it into a thin cloud before pressing it inside the glue outline. Say: "Stretch it soft like a little cloud, then press it inside the lines — our ghost is getting fluffy." Work from the top down together, your child pressing with the whole palm while you nudge stray wisps back inside and add glue where a patch looks bare. When no black paper shows through, give it one last gentle pat — finished and fluffy, it just needs a face.
-
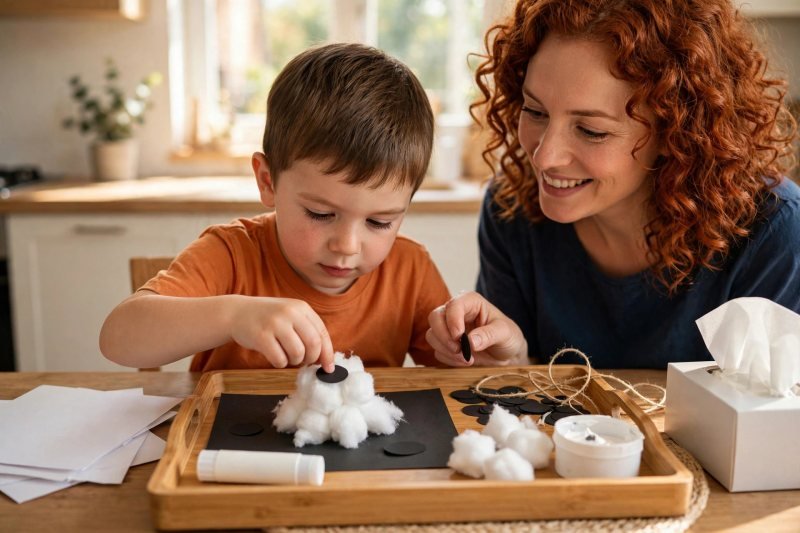
Add the ghost's face. Set out just three pieces — two black circles and one small oval — and count them together first. Say: "Two eyes and one little mouth — where should they go?" Let your child place the circles near the top of the cotton ghost for eyes, then the oval underneath for a small, friendly mouth, pressing each piece firmly into the cotton. If a piece will not stick, add a dab of glue behind it yourself and let your child press it home. Slide it aside to dry — ghost two is made from your child's own hand.
-
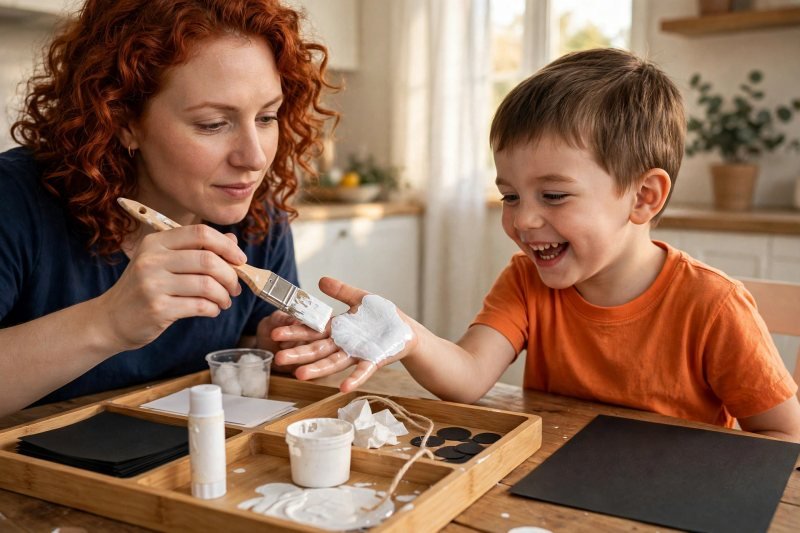
Paint a white hand. Pour a little white paint onto a spare sheet of paper and ask your child to hold one hand flat, palm up, fingers spread like a star. Say: "Hold still like a statue — the brush is going to tickle." Load the wide brush and paint the whole palm and every finger with a smooth, even coat, working quickly so the paint stays wet; touch up thin spots with a second pass. Keep the other hand paint-free. The moment the hand looks like a little white glove, move straight to the fresh black paper beside you — wet paint waits for no one.
-
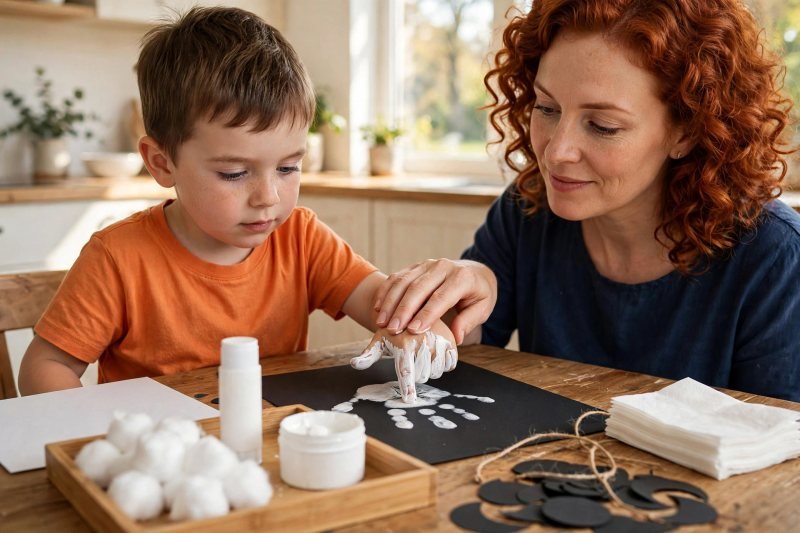
Press the handprint ghost. Slide fresh black paper in front of your child and guide the painted hand onto the middle, fingers pointing down and held close together, palm landing first. Say: "Fingers pointing down — press, press, press, and hold like a statue." Press gently on the back of the hand and each fingertip with your own clean hand, count slowly to five together, then lift straight up so nothing smears. A plump white palm is the body; five wavy finger trails make the floaty bottom. Set it aside to dry — it just needs a face.
-
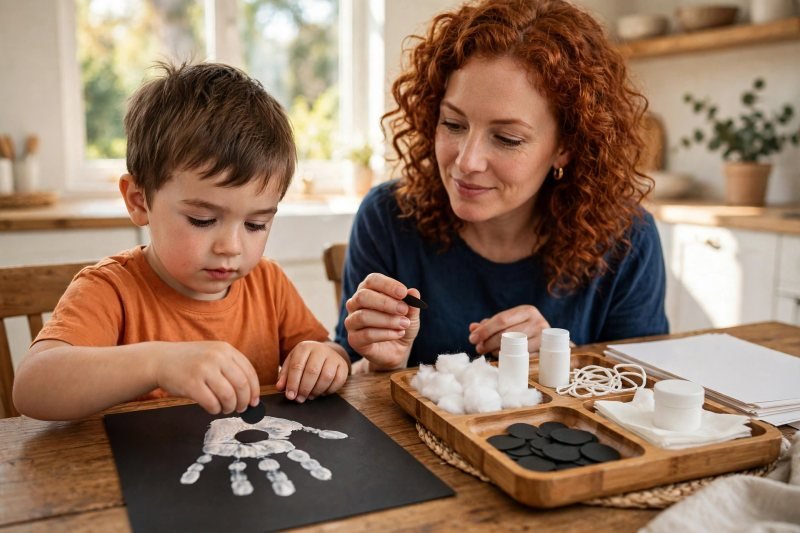
Give the handprint ghost its face. Once the print feels dry to a fingertip touch, bring out two black circles and one small oval, counting them together like last time. Say: "This ghost is you — your hand made it. Where do its eyes go?" Let your child stick the circles onto the palm for eyes and the oval below for the mouth, pressing each flat; a dab of glue behind each keeps them secure. Then wash the painted hand together at the sink with soap, hunting for every white patch between the fingers. Hands clean, ghost complete — time for the floatiest ghost of all.
-
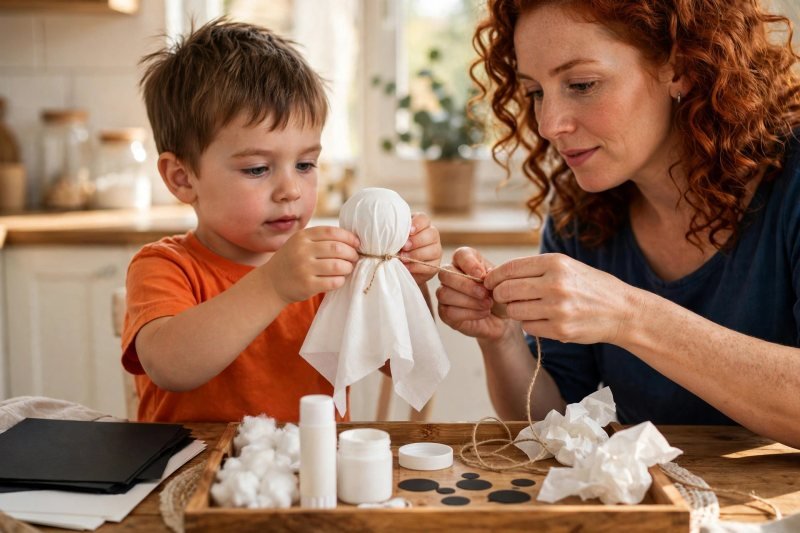
Drape a tissue ghost. Scrunch one tissue into a loose ball with your child — the hidden head — then drape a second tissue over it and gather it underneath like a cloak. Say: "The ball is the head, and the tissue is the floaty dress — gather it all underneath." While your child holds the bunch under the ball, loop string around the neck, just under the ball, and tie gently — snug, never tight. Fluff the folds, hold the ghost up, and blow underneath together so it dances. All three ghosts are made — now they become one garland.
-
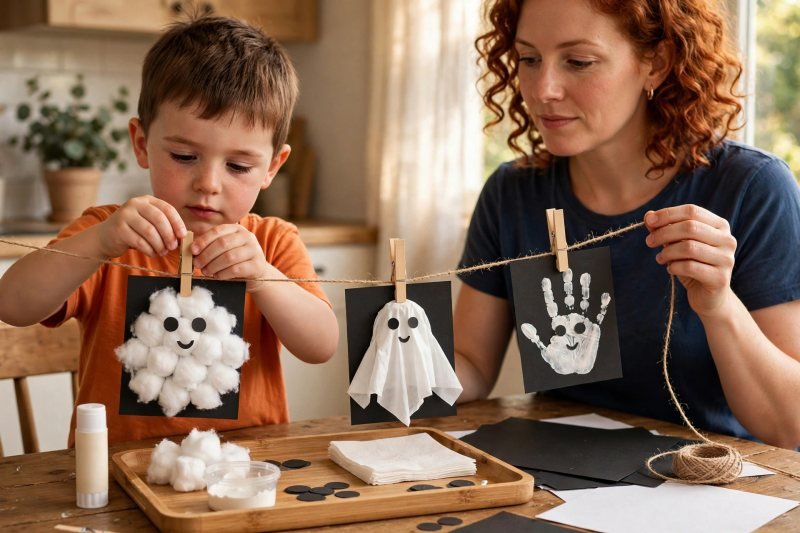
String the ghost garland. Lay the long string across the table: cotton-ball ghost at one end, handprint ghost at the other, tissue ghost in the middle. Clip each paper ghost to the string at its top edge. Say: "Clips are alligator mouths — open, bite the paper and the string, let go." Squeeze the first clip together until your child gets the pinch; the tissue ghost clips on last, in the center, folds hanging lowest. Slide the ghosts until evenly spaced, leaving string tails at each end for hanging.
-
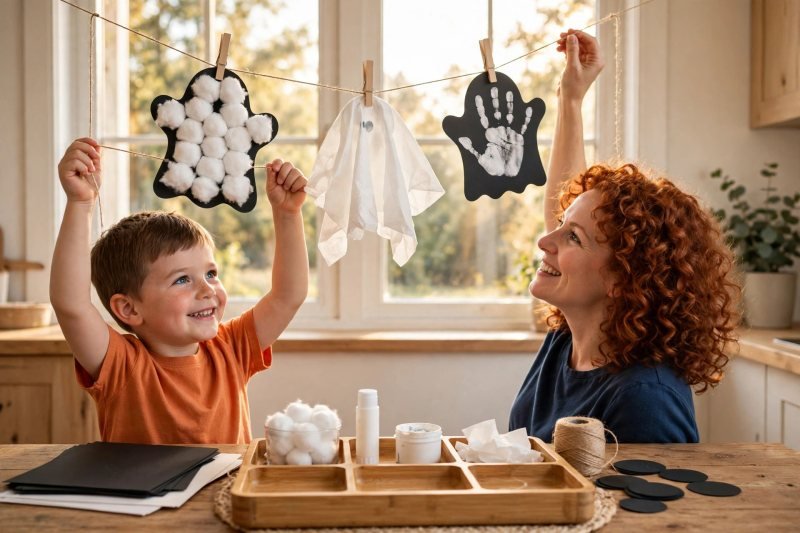
Hang the garland and celebrate. Carry the garland to the doorway or window you chose, your child holding one end with both hands, and fix each end yourself — tape, a hook, or tied to handles. Say: "Up they go — three friendly ghosts, made by you." Step back and admire the row: fluffy, handprint, floaty. Blow gently to set them bobbing and retell how each ghost was made. Then tidy the tray as a team — lids on, scraps binned, brush rinsed, hands washed.


Make it easier
Make one ghost per sitting — the cotton-ball ghost is gentlest — and let the garland grow across the week. Pre-stretch the cotton balls yourself so your child only presses them into place. Use bigger paper circles for faces; small fingers position them more easily. On a low-energy day, skip paint: trace your child's hand on white paper and cut it out yourself.
Make it harder
Let your child draw the glue outline while you only steady the paper. Grow a ghost family: a second garland row, your child deciding each new face. For a whole shelf of friendly October makes, see our Halloween crafts for preschoolers. Ask your child to tell the session back — first, next, last. Count the cotton balls, clips, and ghosts. For more pinch-and-press practice, these fine-motor activities for preschoolers keep little fingers busy.
Other ways to play it
- Friendly ghost parade: tape the paper ghosts to craft sticks — instant puppets for a giggly show.
- Sunny window ghosts: make the handprint ghost on white paper and tape the ghosts to a sunny window.
- Color-pop ghosts: try pastel paper ghosts or a soft color wash; for more shade play, these color-mixing activities for preschoolers make a whole session of it.
- Any-season garland: the same techniques become snowmen, suns, or spring chicks with new colors and faces. The same garland idea returns at Christmas in our Christmas crafts for preschoolers.
How it changes by age
- Ages 3-4: the sweet spot for this session. Threes mostly stretch, press, drape, and place pieces you hand them, while you draw the glue outline, tie the string, and hang. Fours can often manage the outline, clip-pinching, and faces with light help. Keep it under forty minutes and stopping after two ghosts is fine.
- Younger toddlers (under 3): cotton stretching and tissue scrunching only, adults doing the rest; no small pieces, no string. Simpler seasonal makes at that age are in our Halloween crafts for toddlers.
- Ages 5 and up: older siblings can cut face pieces, tie knots, and design extra ghosts; the younger child stays in charge of fluffing and faces.
What they're learning
Fine motor control: stretching cotton, squeezing glue, pinching clips, and placing small pieces build hand strength for early writing. Sequencing: outline, fill, then face — a first-next-last order your child can retell. Early math: counting eyes, mouths, clips, and ghosts; comparing circle sizes; spacing ghosts along a string. Cause and effect: paint plus pressure makes a print; a gathered tissue plus a tie makes a floating shape. Confidence and pride: three finished ghosts, made by their own hands and proudly displayed.
Clearing up
"Ghost crafts are too scary for little kids." Not these — a fluffy cotton cloud with a surprised smile is about as frightening as a marshmallow. "Handprint crafts always end in mess." They end that way when paint comes out before setup; here the paper is ready and the sink trip is a game. "Cotton balls never stick." They do with a thick glue line, thin-stretched cotton, and a whole-palm press; thick clumps on thin glue peel off. "You need a craft-store haul." Everything here is paper, cotton, tissues, and string.
Questions parents ask
What are easy ghost crafts for preschoolers?
How do you make a cotton ball ghost?
How do you make a handprint ghost?
What do I need for tissue ghosts?
Are ghost crafts too scary for toddlers and preschoolers?
Friendly pumpkin crafts. A Halloween sensory bin guide for ages 3-4. A paper-chain garland.

save it for later
Pin this for the next rainy afternoon
Keep it on a board so it is there when you need it, rather than when you happened to find it.
Save to Pinterest


